
Table of contents:
Setting up a test environment
1. Introduction:
In my articles about Visual Studio Code (VSCode) and Bootstrap 5, I mention
among other things, how to compile Bootstrap 5's SCSS files into CSS files,
that you can use in your webpages.
To do that efficiently it is good to think a little about how to set up your test environment. You can set up your test environment in such a way, that you can use it in both of the following cases:
-
For compiling with VSCode's SASS plugin as described in the
Visual Studio Code explanation (VSCode)
pages on my website.
- For compiling through the system that uses Node.js, NPM and the SASS package, as will be described in the Webdesign with Bootstrap 5 pages on my website.
For both cases, the test environment can have the same Directory structure, as described in the next chapter.
2. Creating the Directory structure.
Before you start creating directories, I would say you think a bit about what things you might need, when creating your website. I will assume you follow the course I mentioned in my article about Visual Studio Code. But if you follow another course thats fine, you might need the same kind of directory structure.You will need:
- Following a course you will need to have a directory to put your coursefiles in, let us call that course-files. You can unzip the file with exercises, material and whatever is in the zip file, here. After unzipping, keep the files as they are, so as originals that are never changed by you.
- You will need a directory exercises for your own exercises. You better keep that separate from the original files, to be able to find your mistakes. When you follow an exercise, first copy the original files into their own subdirectory below this exercises directory and start from there.
- You will need a directory for your own website, let us call that public_html, because many webhosting services have your website files inside a directory called something like that. This directory is where you will put the finished files for your website. You can upload the files from this directory to the server of your hosting provider, when you are finished.
- You might need a separate directory for your experiments and/or for other examples you downloaded from the web. Let us call that experiments
- Because you will compile your own SCSS files, it helps to put them in their own scss-directory, and have the created CSS files in their own subdirectory inside your website directory. We will talk about that later on, and explain that process. The directory name for these files will be scss.
I advise you to put these 5 directories, together inside there own main directory, as described in the following chapters.
2.1: The Root-directory.
The first thing we need is the root directory, in which we will put all other directories and files.Because the root directory will contain many subdirectories, which in turn will contain many subdirectories, and so on, it is better to start from a directory, that is directly below the root of a drive. That will make the directory paths easier to follow. Follow the steps as I describe them below. (You can use your own names of course, but then you might have to change things in the files and examples I mention.)
Create a directory bootstrap5, like so:
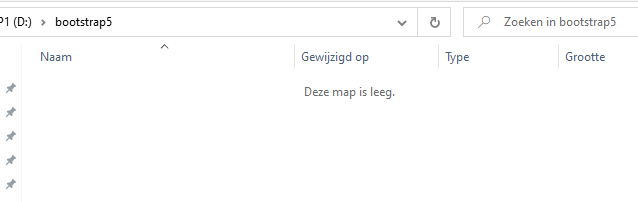
(The windows text inside the screenshot contains dutch words, because I am dutch and use a dutch Windows version.
But my file- and directory names will all be in english so you can better follow what I do.)
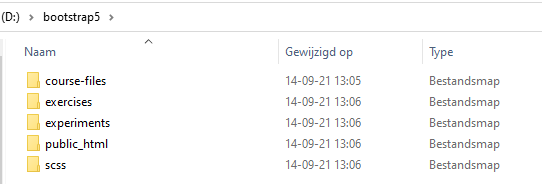
The directory sits right below the root of my D-drive so paths will not be too long. After creating the directories it looks like this:
2.2: The website files.
For the organization of the files in this directory, the same applies as for what I said in chapter 2: think a bit about what you might need!- css and js files most often go inside a directory called dist. Inside this dist directory we create 2 subdirectories: a js directory for the javascript files. And a css directory for our compiled css files.
-
We create an assets directory. Here we will put the pictures
and other files needed for example as pictures on our buttons, as
pictures inside our HR-lines, pictures for our heading, footer and that
kind of stuff. We can put our favicons here, and more pictures we might
need inside our css files.
These are the pictures that might be used many times throughout your whole website. -
We create a pictures directory, for all other pictures used in
the articles of our website. If you have many articles you can organize
the pictures in subdirectories of pictures which have the name
of the article.
The pictures in this subdirectory, are the pictures that are mostly used only once inside a certain article. - Files about sitemap, general introduction, contact, blog, news, etcetera, can go inside an info directory.
You can of course use your own names, but the directories I just mentioned, are very common, also in examples on the web. So if you use those names it is easier for you to follow examples in my articles and on the web.
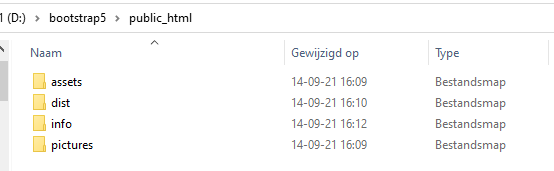
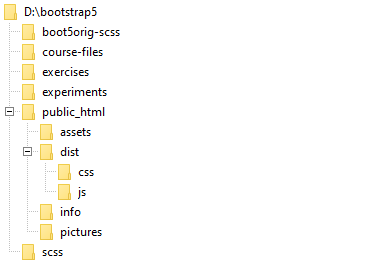
Your public_html directory now looks like this:
2.3: Your own CSS and JS files.
As mentioned in chapter 2.2, the compiled CSS and JS files will be put inside the subdirectories of the dist directory in your public_html directory.If you have other css-files or js-files, for instance coming from plugins or tools you use on your site, you have to make sure those are put in the above mentioned directories below dist too.
When you compile your SASS-files with the sass compiler belonging to the Nodejs / NPM system, they can be copied through your json file. For an explanation of how that is done, see the article about Bootstrap 5.
2.4: The SCSS files.
To compile the Bootstrap-5 SCSS files, you need two sets of SCSS-files:-
First set:
The original Bootstrap-5 SCSS files. These files will not be touched or changed in any way.
NPM: When you choose to work through NPM, the directory for the original Bootstrap-5 SCSS files, will be created for you when you install the whole NPM system, and it will get its own subdirectory, below a directory called: node_modules. That will all be further explained in the Bootstrap5 pages on my website.
VSCode: When you choose to work with VSCode, you have to create a directory yourself. We will call it boot5orig-scss for clarity.
-
Second set:
The SCSS files with your own changes and additions to the original Bootstrap-5 SCSS files. We will put these in a directory called "scss", directly below the "bootstrap5"-directory.
So when we start with this directory structure from chapter 2.1:
-
When using the NPM system your directory structure will look like this:
Subdirectories when using the NPM system. Subdirectories when using the NPM system.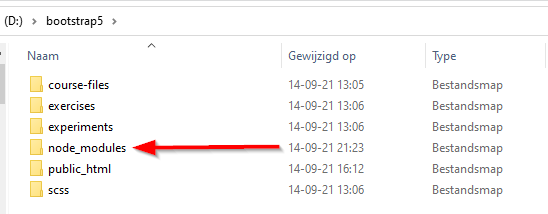
-
When using VSCode, your directory structure will look like this:
Subdirectories when using VSCode. Subdirectories when using VSCode.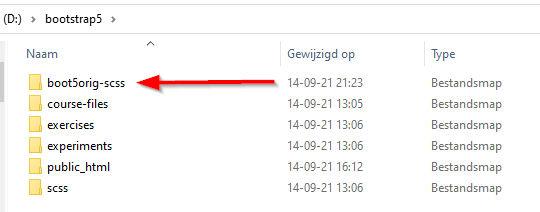
Here is a directory tree to get a better understanding of the directory structure:
3. Using your test environment.
Now your test environment is ready, you can start using it. But how that is done, depends on how you compile your SCSS files.To be able to use your environment, you have to add some more settings, either to VSCode, when you compile with Visual Studio Code, or to the file gulpfile.js when you compile through NPM.
Because of the many differences in both methods and settings, this is explained in their own chapters.
-
So for setting VSCode, goto chapter 10 of the VSCode article:
VSCode, Live Sass Compiler and Bootstrap. -
Are you compiling through NPM, goto chapter 1 of the Bootstrap5
article (when it is written).