Table of contents :

Visual Studio Code logo

8. VSCode, Project and Project plugins.

VSCode is basically a text editor by design, and works with Workspaces, not with Projects. But you are able to use projects, by adding components for it.
The easiest way of working with projects, is first to create 1 or more Workspaces, as described in the previous chapter.
There are 2 Project plugins I will describe. I suggest you install both of them and do some experiments to see which one you like most. Those 2 plugins are:

8.1. VSCode, Project Dashboard by Kruemelkatze.

VSCode: Plugin: Project Dashboard by Kruemelkatze.

Your version might have a newer version number.


VSCode: Plugin: Project Dashboard icon in leftbar.
After installing this plugin you get this Project Dashboard icon (9 small squares) in the left sidebar of VSCode. Clicking on this icon gives you the Project Dashboard tab with the mini windows. You can see part of the tab to the right of the Explorer sidebar.

Projects can be organized into groups, that can be edited and reordered on the dashboard tab itself. (see the next chapter)

The dashboard itself can be configured in many ways:
  • You can change the startup behaviour.
  • You van change the visibility of the Project path
  • Project title size can be changed
  • You can define where projects are stored
  • And many more options are available

The contents of the project dashboard tab, looks like below. 1 or more windows with colored top bars. You can move these windows around with your mouse.

VSCode: Plugin: Project Dashboard example.

The Project windows can be colored, the sizes can be adjusted (inside VSCode settings)
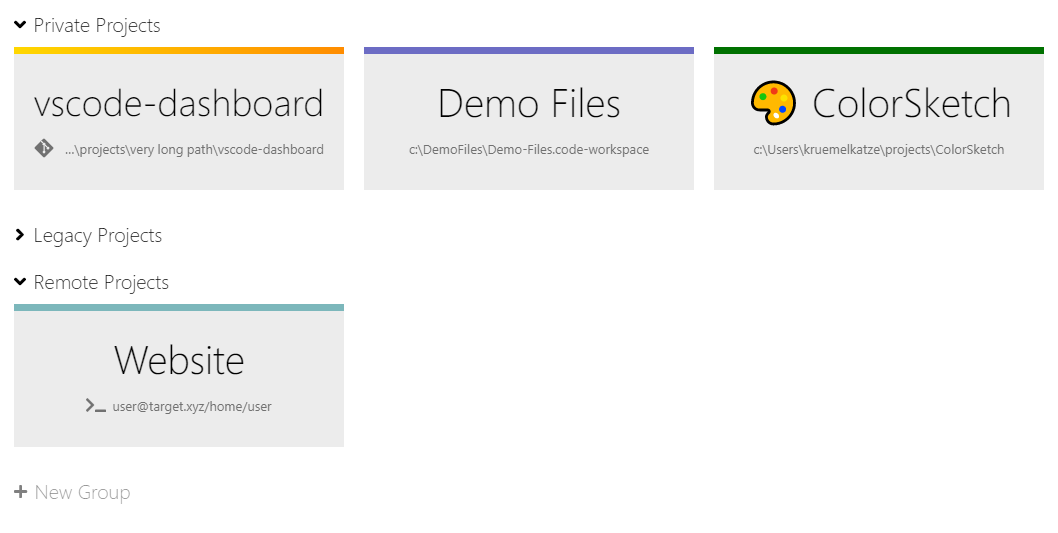
Clicking on one of those windows, opens that project in your workspace.

VSCode: Plugin: Project Dashboard rightclick.
Rightclicking on one of those mini windows, gives you a popup-menu, with many possibilities.

8.2. VSCode, Working with Projects in Project Dashboard.


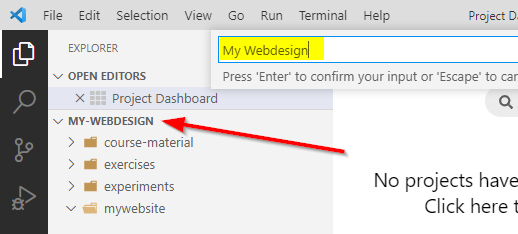
To create your first Project Dashboard Project, act as follows:
Make sure you have opened the directory my-webdesign, the one we have used in creating our test environment.

VSCode: Plugin: Project Dashboard first project.

Now open the Project Dashboard, by clicking on its icon in the left sidebar. Now your screen looks as above. Next you click on the message:
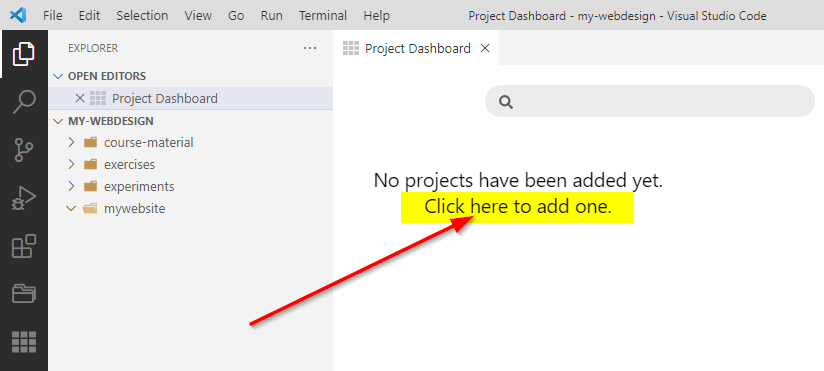
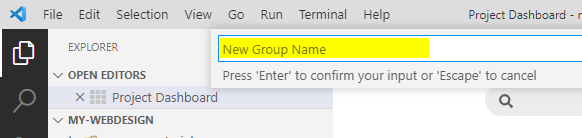
Click here to add one.

This opens a box in which you can enter the name of your first group.
VSCode: Plugin: Project Dashboard New Group.

We will call the group: My Webdesign, after the maindirectory of our environment example.

VSCode: Plugin: Project Dashboard Enter Group name.

After filling in the name, press ENTER.
Now you have to define what type of group it will be.

VSCode: Plugin: Project Dashboard Choose Project type.

We choose Folder Project

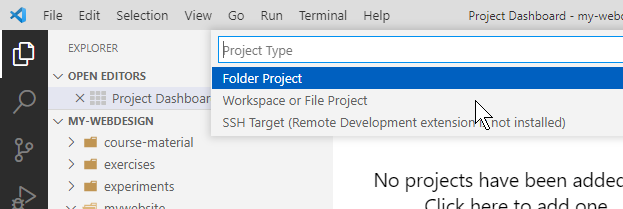
You get the next screen where you can choose the directory that will be your first project.

VSCode: Plugin: Project Dashboard Choose Project directory.

( We choose the name of the first sub-directory of the environment example.)
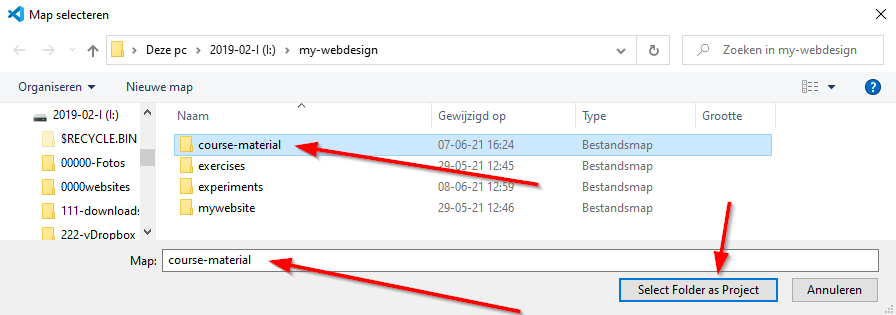
Next we click on Select Folder as Project
Which gives us:

VSCode: Plugin: Project Dashboard assign project name.

All you have to do is press ENTER again.

VSCode: Plugin: Project Dashboard choose topbar color.

Here we have to choose a color for the topbar of the Project Dashboard window

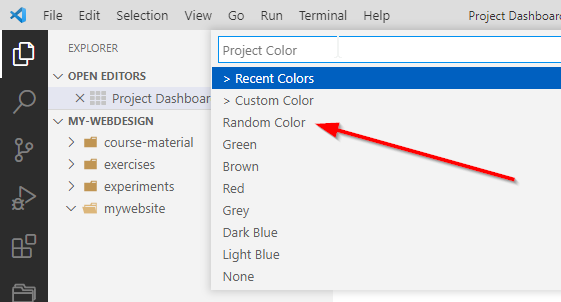
We choose Random Color, so the plugin will take a random color. This gives us our first Project Dashboard Project!
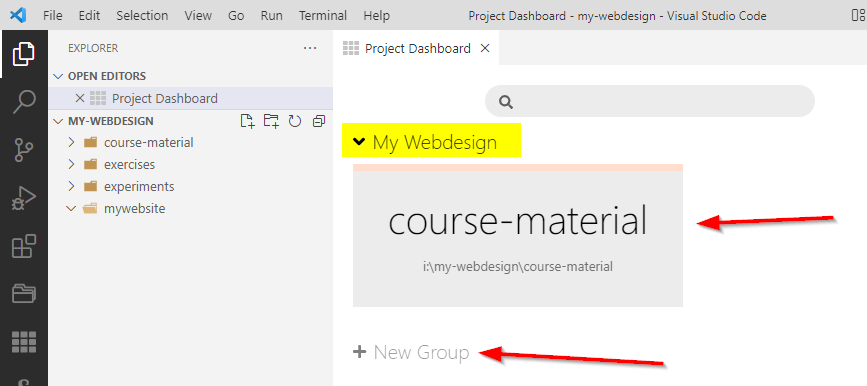
VSCode: Plugin: Project Dashboard first project visible.

As you can see its name is course-material and it is placed in our first group:
My Webdesign.

When we want to add a new group we can click on the New Group button (with the little plus-sign in front of it)

Now hold your mouse above the little Project window:

VSCode: Plugin: Project Dashboard first project, icons.

As you can see another plus-sign appears, right after the small project window. If you would click it you can add the next project inside this group

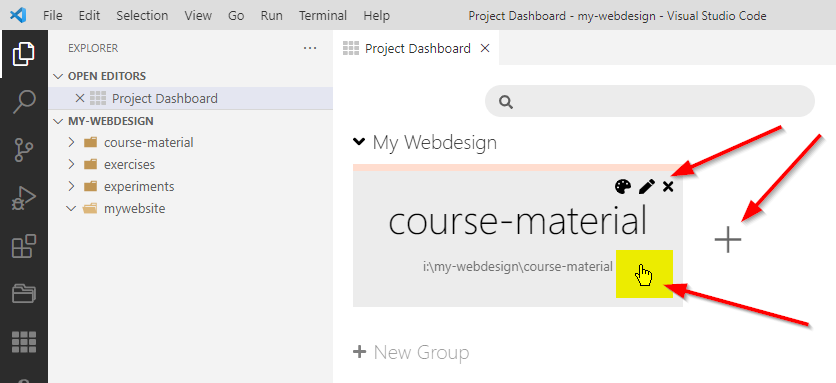
While still holding your mouse, you also see 3 little icons appear in the top-right of the little project window. From left to right they are for:
changing the color topbar,
Editing the name of the project,
Removing the project. (Carefull with that)

VSCode: Plugin: Project Dashboard first project move with mouse.

You can grab the top-bar with your mouse, as the above picture shows, to move around the window.
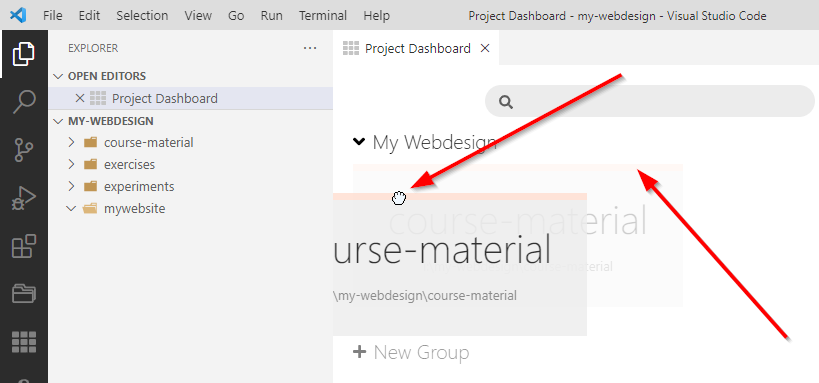
In grey you see the windows original position.

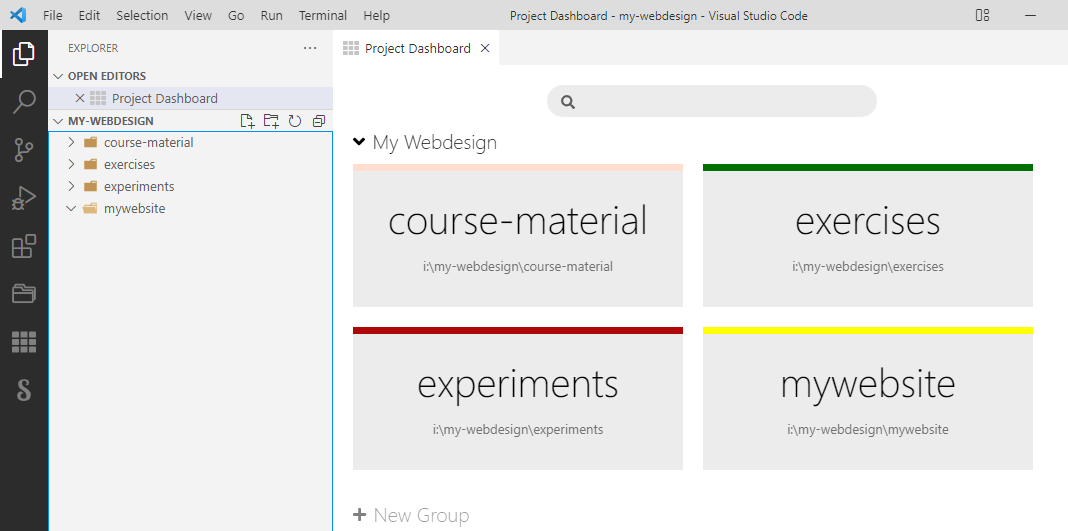
Now you know how to add projects, I suggest you add a project for the other 3 directories of the environment example, so you get something like this:

VSCode: Plugin: Project Dashboard 4 projects
VSCode: Plugin: Project Dashboard 4 projects.


8.3. VSCode, Project Manager by Alessandro Fragnani.

VSCode: Plugin: Project Manager by Alessandro Fragnani.

Your version might have a newer version number.

VSCode: Plugin: Project Manager icon in leftbar.
After installing this plugin you get the Project Manager icon ( some small tabs) in the left sidebar of VSCode. Clicking on this icon gives you the Project Manager sidebar (here: in yellow).


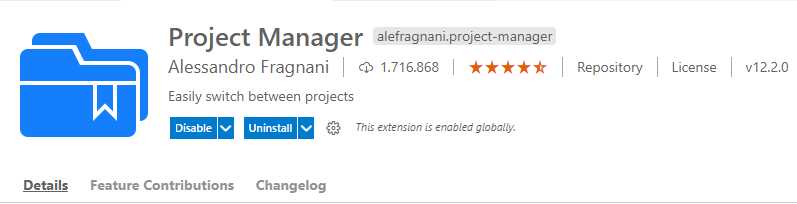
Some of the features of Project Manager are:
  • You can save a folder or one or more of your workspaces as a Project
  • You can add Tags to your Projects and organize them with those Tags
  • You can open projects in the same or in a new window
  • Reach your Projects through a Side Bar
  • And more

8.4. VSCode, Working with Projects in Project Manager.


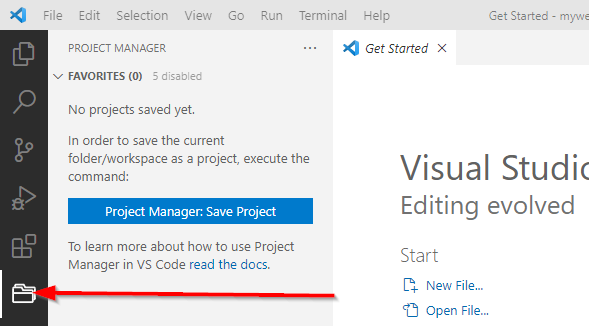
When you have no projects in the Project Manager yet, first make sure you select a workbench directory in the explorer. Here I have chosen for the subdirectory from the environment settings we previously made:

VSCode: Plugin: Project Manager: from directory to project.
The directory mywebsite is visible in the Explorer sidebar.

With that directory visible, click on the project manager icon:
VSCode: Plugin: Project Manager: click icon.
Now the Project Manager sidebar is open.

With that directory visible in the Project Manager sidebar, click on the blue Save Project button.
VSCode: Plugin: Project Manager: click blue save project button.

You will see a box filled with the name of the directory in the Explorer: mywebsite.
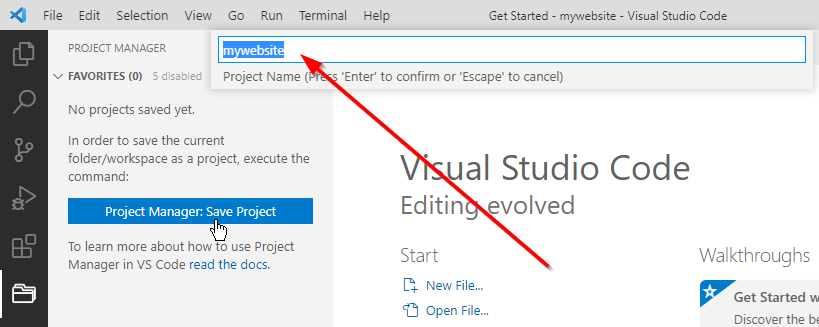
That will be the new projects name. Either press enter to accept it, or change its contents to the name you want, before pressing enter.

You now have a project like this:
VSCode: Plugin: Project Manager: Your first project.


Try holding your mouse above the project as in the following screenshot: (Do not click ! !)
VSCode: Plugin: Project Manager: Info under your mouse.

When you hold your mouse over the plugin, the plugin shows you the directory name of the project.
The yellow area points to more actions for this project.

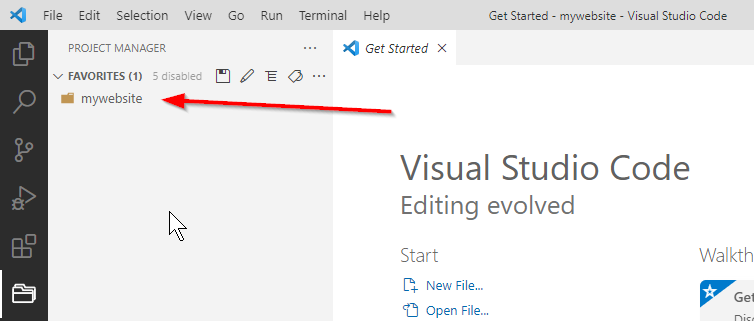
We now have our first Project Manager project.

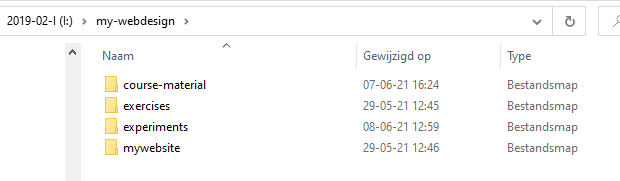
But as you remember in our test environment we had this:
VSCode: Plugin: Project Manager: Testenvironment.

We just turned only one of the directories, mywebsite, into a project. Now we will also turn the other 3 directories into projects.

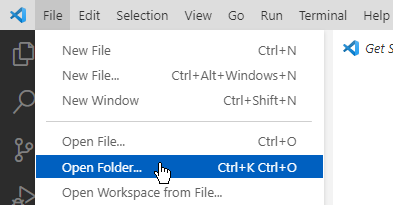
From the menu choose File / Open Folder...
VSCode: Plugin: Project Manager: File Open Folder.

Now find the map my-webdesign/course-material and click on it. When the screen looks as below, click on Select map (which is Map Selecteren in my Dutch PC):
VSCode: Plugin: Project Manager: Find and select the map you need.


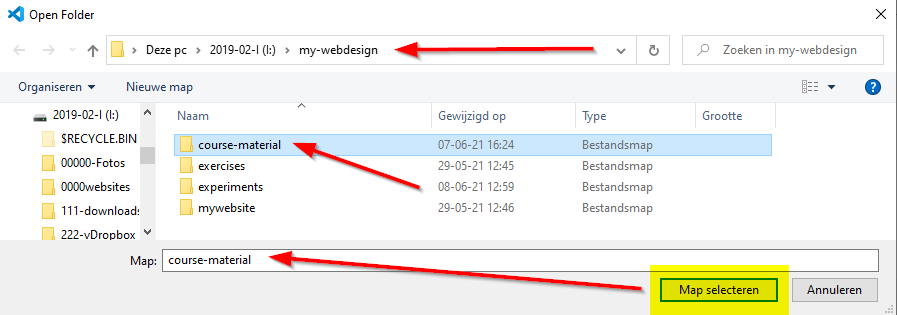
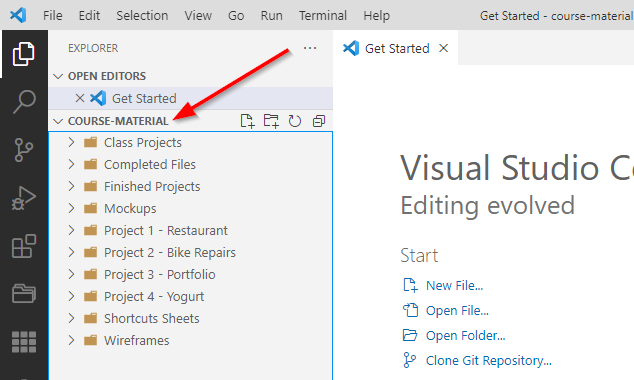
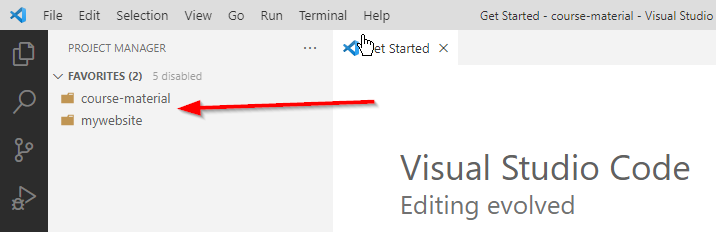
After clicking the explorer shows the map and contents of course-material in the Explorer tab.
VSCode: Plugin: Project Manager: Chosen map visible in Explorer.


To assign the next project, first make sure to open the directory my-webdesign/mywebsite in the explorer window, by choosing File / Open Folder from the main menu. Resulting in:

VSCode: Plugin: Project Manager: Next map visible in Explorer.


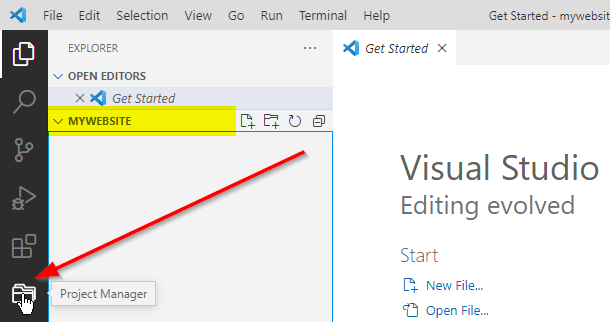
Click on the Project Manager icon in the left sidebar to open the Project Manager Sidebar.
Result:

VSCode: Plugin: Project Manager: To save next project in Project Manager.
Because we now already have 1 Project Manager project, there is no more blue Save Project button visible.
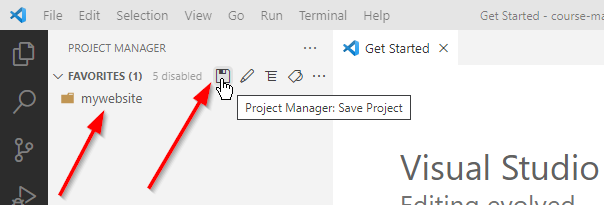
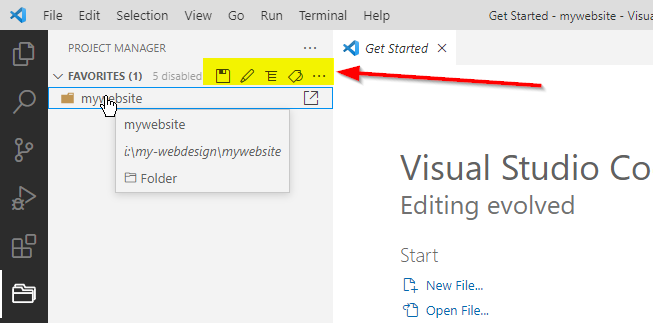
So we have to use another method to save our new project:

As you can see in the screenshot above, there is a tiny save project icon behind Favorites (right arrow)

Click on that Project Manager Save Project icon to open that project name box again:
VSCode: Plugin: Project Manager: (Change name) and save next project in Project Manager.

When you agree to the Project name press Enter:
VSCode: Plugin: Project Manager: (Change name) and save next project in Project Manager.

Now FAVORITES contains 2 projects.

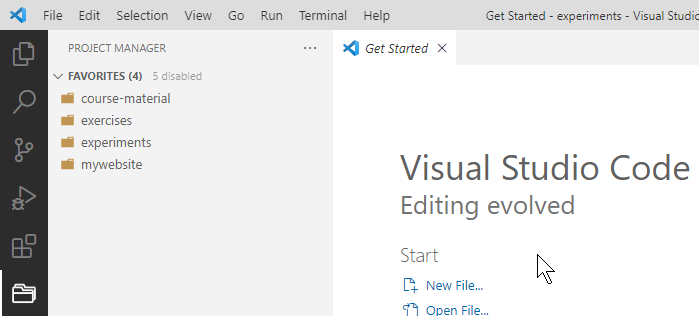
Repeat the process for the last 2 directories of our environment example, so you get:
VSCode: Plugin: Project Manager: 4 projects visible.

On the Project Manager sidebar, Favorites now contains 4 projects.

8.5. VSCode, Combining the Project Managers.

You might think it would be handy to combine the 2 Project manager plugins. So far that is not possible. You CAN however use them side by side, but the information and properties are and stay separate.

Around april 2020 however, an issue was filed by the creator of Project Dashboard to combine the 2 plugins, but sofar this has not been done. Read about that here:
Github: Interact with Project Dashboard Extension