
- 1. Visual Studio Code, VSCode, introduction.
- 2. VSCode, install and screen explanation.
- 3. VSCode, Settings.
- 4. VSCode, Settings.json file.
- 5. VSCode, plugins.
- 6. VSCode, plugin: Live Server.
- 7. VSCode, Workspaces.
- 8. VSCode, Project and Project plugins.
- 9. VSCode, Live Sass Compiler.
- 10. VSCode, Live Sass Compiler and Bootstrap.
- 11. VSCode, Watching. To be written.
- 12. VSCode, Other plugins.
- 13. VSCode, Tips for Visual Studio Code.
- 14. VSCode, Usefull Links.
5. VSCode, plugins.
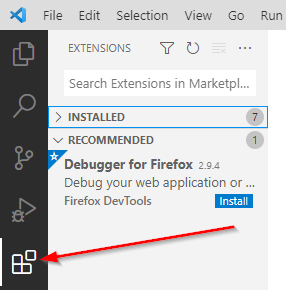
You can choose plugins from inside VSCode itself by means of the
extension button in the left sidebar.
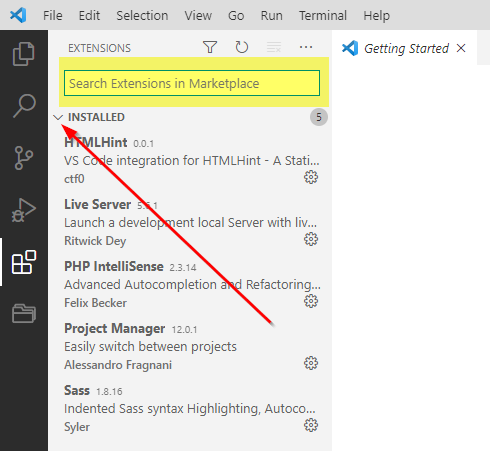
As you can see there is a search button near the top of the opened
extensions tab. Typing in that box makes VSCode search as soon as
you type any character.
In front of INSTALLED is a tiny arrow with which you can
open or close this list of installed extensions.
5.1. Visual Studio Code, how to install a plugin?
Now suppose we want to install the plugin called HTMLHint. For that we start typing its name in the search box, and when we reach htmlh we can already see the list of plugins that have those character sequence in their name.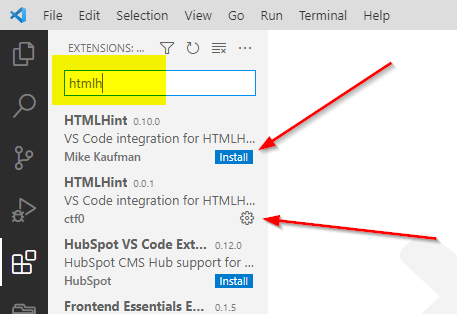
Plugins that can be installed, have a blue INSTALL button. Plugins
that are already installed dont have this button.
Compare this screenshot with the next.
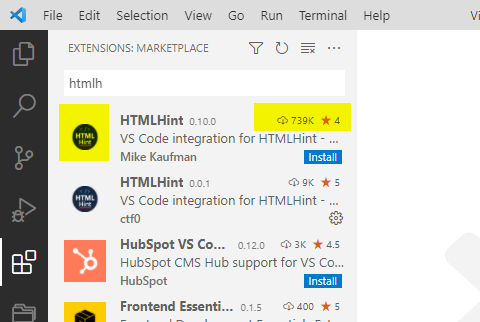
This screenshot gives more information about each extension. That
is because I made the extensionstab wider than the one in
the previous screenshot.
So if you want to see the plugin icon and its rating, make sure
the tab is wide enough!
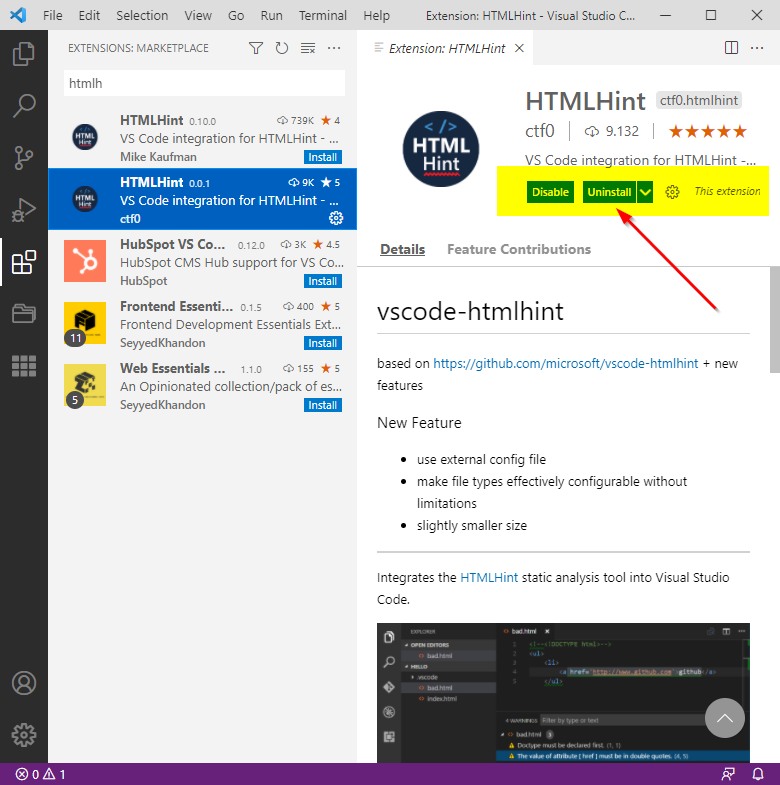
If you select a plugin in the list, here the already installed HTMLHint
plugin, another tab opens, with more detailed information.
Because in this case, the plugin is already installed, you see a
Disable and an Uninstall button.
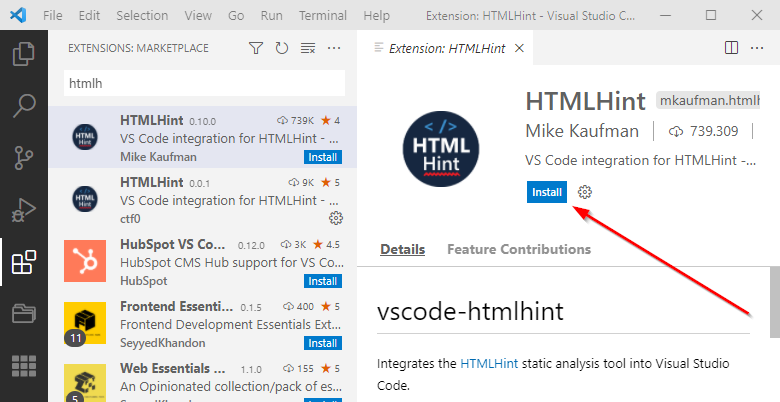
If you select a non-installed plugin in the list, you see an install button.
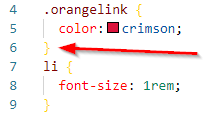
Suppose we want to install the pluging Bracket Pair ColorizerThis plugin colors matching brackets with the same color so they are easily recognizable. You can define extra tokens that should match and which colors to use.
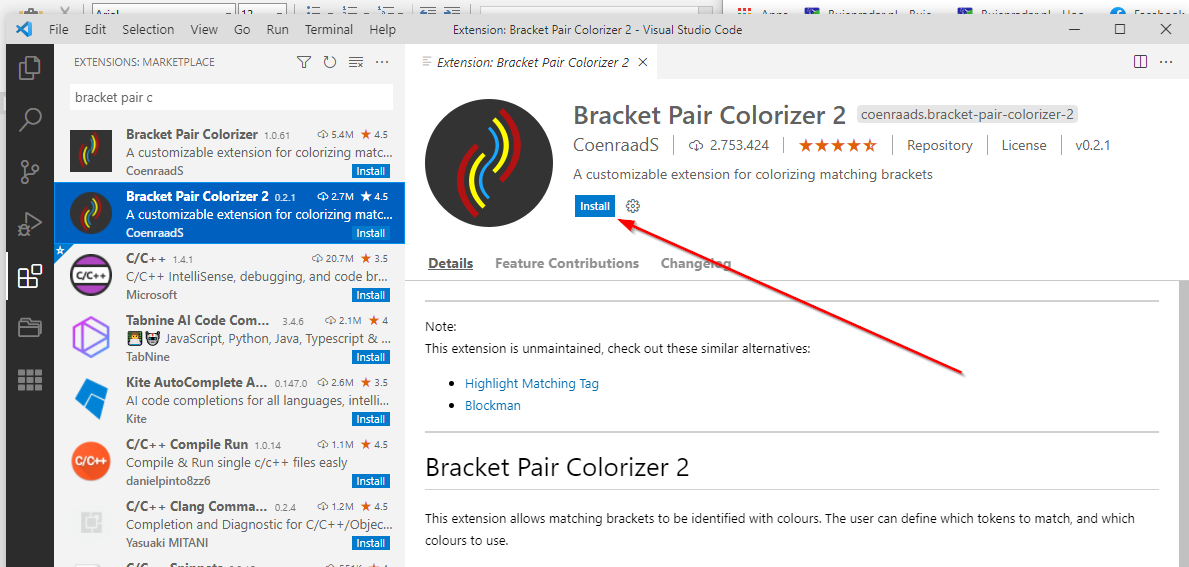
This plugin has 2 versions. I choose the most recent one, version 2.
Press the install button.
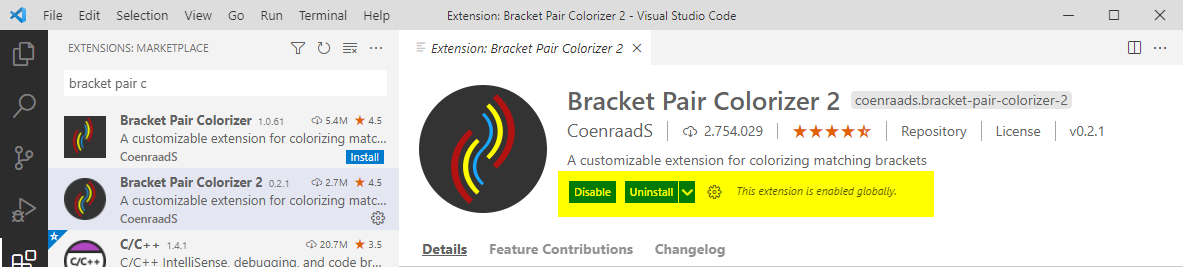
After installing the buttons have changed.
Sometimes, after you install a plugin, a new icon appears in the left side bar. For instance after installing the Project Manager plugin by Alessandro Fragnani.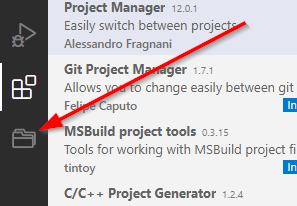
But this extra icon only appears for certain plugins. Most plugins
do not add any icon.
If you ever notice an icon in the left sidebar, that you do not
recognize, search for a plugin with that same icon. Generally the
icon in the sidebar, is the same as the icon you saw in the extensions
list for this plugin.
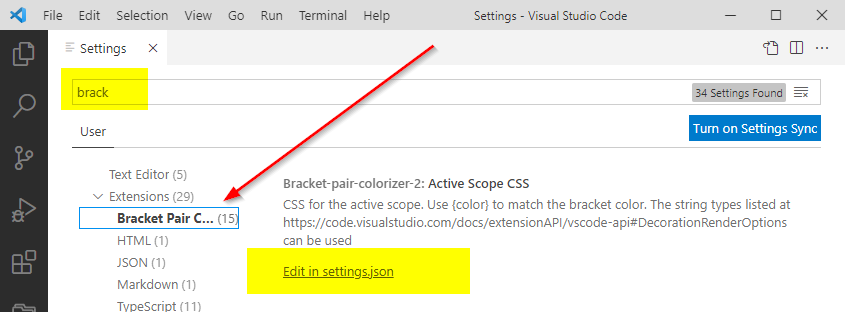
So we have to change the colors for a light theme. We go to the settings tab, type brack, and choose Bracket Pair Colorizer:
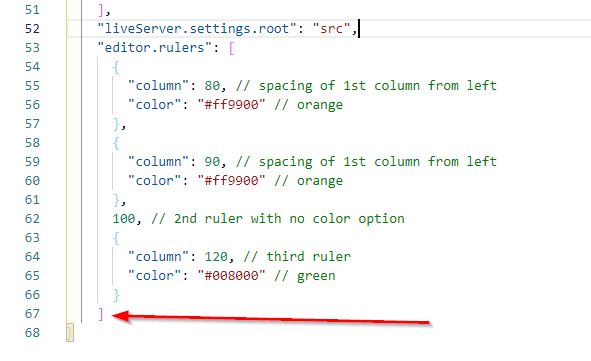
You need to go to the end of your settings.json, right behind the last square bracket in this case. Typ a comma right after the square bracket.
After that insert the following code:
                          "bracket-pair-colorizer-2.colors": [
                                "Lime",
                                "Orange",
                                "CornflowerBlue",
                                "HotPink",
                                "Gold",
                                "Magenta",
                                "IndianRed",
                                "DeepSkyBlue",
                                "OrangeRed"
                          ]
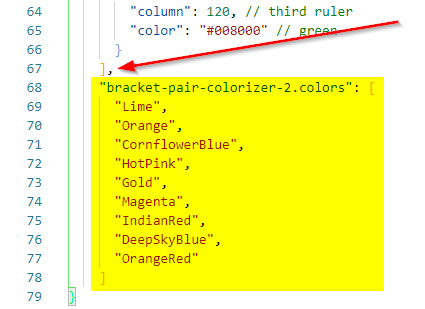
Make sure the brackets match and there is that extra comma behind
the last line just before the changes.
When it looks like this you can save.
5.2. VSCode, HTMLhint plugin.
This plugin will report the number of errors in your HTML files in the Status bar, and details of the errors in the Problems panel.

After installing it, it looks like this on the Extensions tab.
5.3. VSCode, Emmet plugin extension.
What the Emmet plugin does, is looking at the characters you type, while you are typing them. Comparing the typed characters to an internal list, and if they match, it gives you a popup with what it thinks you might want.
For instance, you just type the letter a:
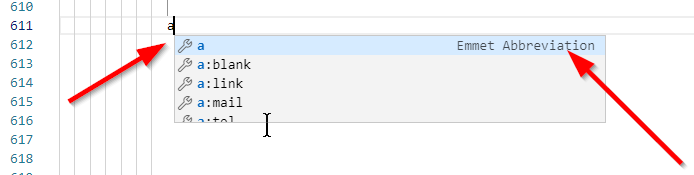
Just type the a, do not type any further just watch what happens.
A popup appears with some lines starting with a. The first line has the text Emmet Abbreviation on the right. Click on the first line and you get:
The Emmet plugin inserted an empty, but complete link on the place of the a-character. You can fill in the link-title and the link yourself.
So this extension helps you to type more quickly, by suggesting complete commonly used HTML statements, for the 1 or just a few characters you typed. But then you have to know what abbreviations Emmet has for which HTML statements.
A complete explanation can be found here: "Emmet in Visual Studio Code."
There is also an Emmet Cheatsheet inside the course material zip you downloaded. (See the first chapter of this article.) You can find the Emmet Cheatsheet.pdf inside the /Shortcuts Sheets directory.
Part of it looks like this:
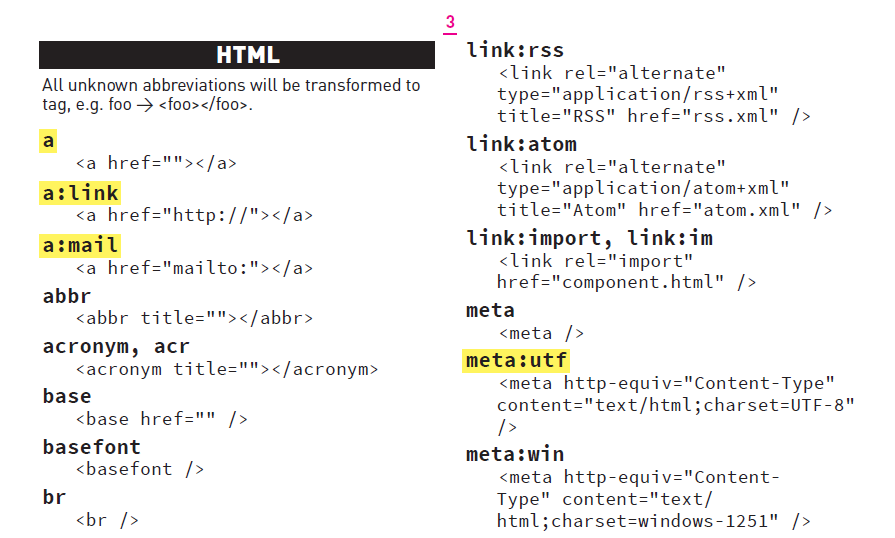
The yellow coloring is done by Daniel Walter Scott, for the youtube
course mentioned in chapter 1 of this article.
These are the most
commonly used abbreviations, according to him.
Create a new empty file inside VSCode, with the command
File / New File, and save it as yourfilename.html.
As you can see the file is still empty.

Now just type 1 exclamation mark, the Emmet popup appears.
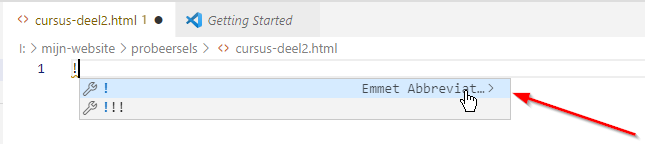
Now keep your mouse above the text Emmet Abbreviation, but make sure the mouse does not move. Then you can see a little arrow pops up right after this text.
Click only on this little arrow (Do not click on the text so just on the arrow.)That gives you:
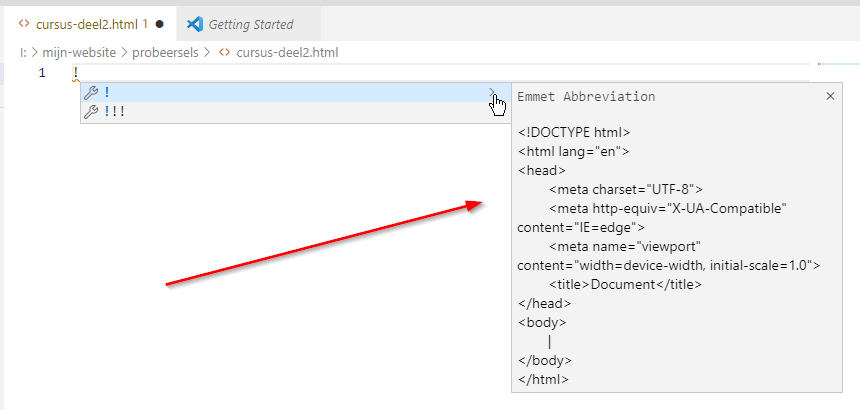
The Emmet plugin shows you what will be filled in for the abbreviation you just typed.
With the first line of the popup still selected, press the ENTER key: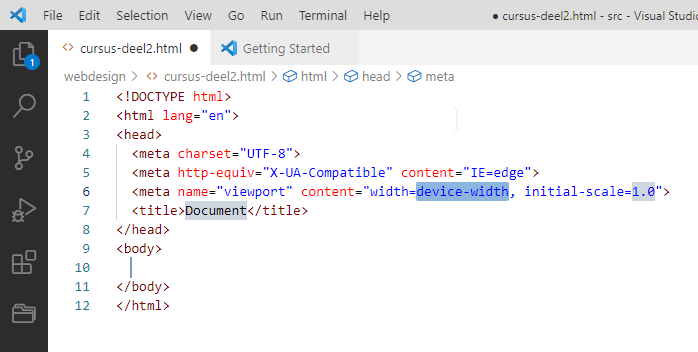
Like magic we get a ready made mini HTML file, with all necessary lines present.
Pay attention to the second line, where it says lang="en". That is the language attribute for this HTML-file. Which is very important. If your language is not english, you should change that to the correct abbreviation for your language.
Furthermore, you might want some extra lines inside your basic HTML file. You can do that by changing Emmets abbreviation list itself. You can add your own abbreviations. But you have to look up how to do that, in the link above.